Tuesday, March 8, 2016

Wood Project: Wooden Small table

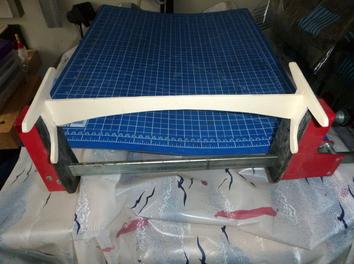
As I still had a remnant of the pyramid, I could make a small table, even as a decoration for the dresser, went really quickly in 2 hours was he ready. It is only a small project, do not be angry; O))
table

Required material
Pcs. Description Material Dimensions
1 Rester plywood 6 mm
tools needed
belt sander
fret saw

1 marking

The template I had lying in my box and much me transfer the same in the hand, now I have it on 6mm plywood.

2 sawing

Since my jigsaw has again happy times after a long time; O).
Jigsaw blade NR. 1

3 loops


Now remove all the rest of the 3 parts with the belt sander.
4 assembly


After grinding I have now assembled the parts with wood glue and the glue gun together, while still aligned.

We highly recommended wood project resource which will you to simply make wood project yourself. Enter Access 16000 Woodworking Plans

Tuesday, March 1, 2016

Wood Project: Regal hardwood country-style

A beautiful bay, country-style, which is really very solid and strong.
Is become great.


Tools needed
jigsaw
Miter saw
Cordless Screwdriver
dowel Help

1 Material Material


5x Solid wood panels (2.8 cm) in pine 30x80cm
4x Construction Timber (2,5x4,5) in pine 160cm long
10x construction timber (2,5x4,5) In pine 24.5cm long
Kindling of pine (2,5x1,5) in pine for the pursuit
dowel
10 screws and covers
some glue
color

2 Cutting, dyeing connect,


The wood can be bought at the hardware store, and etc the screws ..
The wood is then tailor lengths in the indicated above and to remove from the desired color.
First, the two side parts are assembled with the struts.
Given the 2 long sides (160cm) and 5 short (24.5cm) are needed.
These were then joined by means of a dowel gauge and plug together.
After this step, the braces are inserted and secured with glue.

3 assembly, insert plates


After the two sides have been completed, they are to be connected to the solid wood boards. These screws are used and these were provided with covers so that no can be seen. It is important that you vorbohrt the wood.
Last sin the two struts Rear insert with glue

4 Done!


The shelf is really stable and very massive and heavy.

We highly recommended wood project resource which will you to simply make wood project yourself. Enter Access 16000 Woodworking Plans

Wednesday, February 24, 2016

Wood Project: Three masted sailing ship

3D model of a dump truck of the East India Company in the 19th century. The finished model is about 80 x 50 x 20 cm (L x H x W) wide and consists of 42 parts.
The model for this I got from make cnc (as a thank you, as I have pointed out an error in the plan of the car).
The parts are cut quickly, the assembly places a little tricky. But the hardest part was certainly the integration of sailing (especially if you do it alone).


INSTRUCTIONS
Required material
Pcs. Description Material Dimensions
2 plywood birch, 4 mm A2
1 tear-resistant string as needed


1 preliminary Work


The original was a pdf file with two size variants of the model. Once a 1/4 inch (6 mm so good) and once at 3 mm. But since I had only 4 mm thick plywood available, I had to adjust slightly the template.
In addition I have imported the file in Corel Draw and there a single object increased until the slot was exactly 4 mm wide (Fig 1). The need to magnification I have applied to all other objects. Here they were also seated right space as possible on A4 pages.
Some parts are quite large and have to be broken.
After printing I have all the parts cut out the 2-occur repeatedly and (nailed together two plates) on a stack glued.

2 Saws


To warm up times with a small stack started. When cutting, I was very careful always ganau to saw on the outside line. Thus, the insertion slots are slightly narrower than 4 mm and the parts hold together!
Following the instructions I sawed after the poles and the center piece of the pedestal. The frame was equal to even put together - fits.
The ribs and the keel was our turn Again, check the same even if it fits.
The body parts are quite long and the template to each case consists of two parts. These are precisely assembled and then glued to the plywood. Since these parts are required in each case twice I again cut the stack.
Thus the hull grew slowly. This was followed by the parts of the superstructure and the outer parts of the railing. That was quite a delicate matter

3 Hulls


Firstly grind all parts. Especially when the rail extremely delicate was slightly wavy, I decided to glue the parts.
First of all the sub-frame. Then the hull with the superstructure , the rear tab and the anchor. Although I einleimte a 6 mm round timber and fit gleamed. The anchor itself also received a drop of glue and after that was for the first day closing. The glue had time to bond.
After the clamps were removed, the ship was to sail to the finish.

4 Hoist the sails


The sails and saw out on the marked points with a 3 mm drill holes put.
Are all sails cut, the surfaces and then the edge are ground.
Contrary to the instructions I sat in the yards and gaffs bore holes , before I put them in the appropriate places on the mast.
Next up was the hardest and most time-consuming part, the integration of the sail.

5 Done


On the side laces - as the instructions - I have omitted. I like the ship better.
The pictures show a couple of views of the final clipper.
Have fun replica!

We highly recommended wood project resource which will you to simply make wood project yourself. Enter Access 16000 Woodworking Plans

Saturday, February 20, 2016

Wood Project: Wood candle gift

For visits to friends I have made these candles.
In the opening I have a little angel frame image 1, to a small Christmas Nativity was used. Bild2
One can also use figures meet your ideas.

Required material
Pcs. Description Material Dimensions
1 ash wood around 50 mm x 80mm
1 timber Plum 20 x 20 x 50 mm


1 Candle base


Logs radical D 50mm search and shorten to 80mm.
With 35 mm Forstner bit a hole about 30mm deep einbringen.Bild 1
Expand At the milling opening. image 2
grind bottom and drill 2 mm hole for flame. picture 3
 
2 Flame


From piece Edgings 20 x 20 x 50 mm cut.
3D presentation stick and cut flame with scroll saw.
grind flame and drill a 2 mm hole for mounting on the lower part.
connect base with flame. For this I used a toothpick.

We highly recommended wood project resource which will you to simply make wood project yourself. Enter Access 16000 Woodworking Plans